Norwegian Birthday Cake for Arlene
August 23, 2011
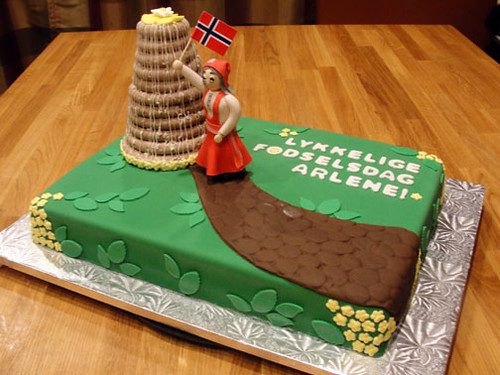
Before designing this cake, I've never heard of a pastry called Kransekake, let alone pronounce it. It's a traditional Norwegian almond cake that consist of a tower of rings, drizzled in icing. This became a major element behind the cake design, along side with a figure of the birthday girl. Penny approached me a few months prior to the cake delivery date with plenty of resources at hand. She came prepared with a family recipe book that contained photos, notes, and a good glimpse into her family's heritage. This book gave me a personal perspective, and allowed me to sketch up some ideas for her mother's birthday cake. Oh yeah, did I mention that this cake had to travel 8 hours in a car? That also came into play when I designed the cake.
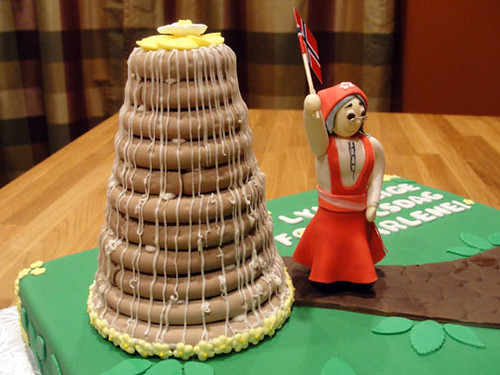
From the very beginning, we decided on a sheet cake based upon the number of servings and the dangers of traveling for such a long time. I wanted the cake to look like a landscape where the miniature Kransekake stood as a monument that Arlene was approaching with a Norwegian flag in hand. I began by forming the ascending rings of the traditional cake out of a 50/50 mixture of gumpaste and fondant. I printed out a template of rings to make sure I had the right sizes and that the increments were consistent. Using a small ball tool, I created small indents to replicate the texture of the real cake. Once the rings were completely dried, I stacked them and attached them together with a bit of melted candy coating. No Kransekake would be complete without the icing, so I drizzled skinny threads of the candy coating down the tower of rings just as if it was the real thing. I placed the Kransekake aside to set while I moved onto modeling a figure of Arlene.
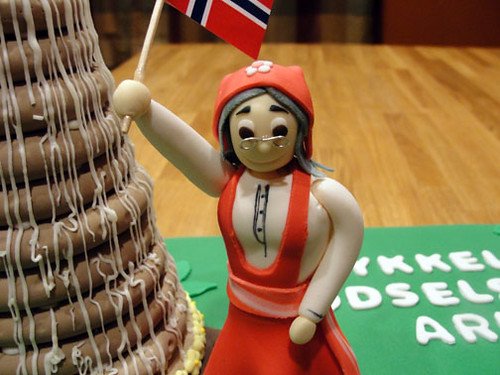
Using a photo from the recipe book, I began shaping a miniature Arlene. I created each part separately and attached them using some gum glue or a toothpick for support. Once the body was firm enough, red fondant was rolled out thinly and hand cut into pieces of clothing just as if I was going to sew together real fabric. These were draped and adhered to her body and shaped for a soft flow. I tucked a little tissue under skirt to give it some fullness until it dried. I gave her salt and pepper hair by marbling a bit of gray and white fondant together and ran a veining tool through it several times to create strands of hair. I made it slightly long enough to peek out from underneath her traditional red hat. Her glasses took a little effort to create. At first I tried making it out of gumpaste, but I was not convinced by the results. It was hard to create something so small and thin. I opted for some floral wire and a small needle nose pliers instead. I twisted the wire to create two loops for the glasses frames and snipped off the excess. With a the help of a little drop of piping gel, I adhered the glasses into position. To complete little Arlene, I printed out a Norwegian flag and wrapped it around a toothpick and inserted it into her hand with a drop of piping gel to secure in place. I placed a styrofoam cup below it for support until it dried.
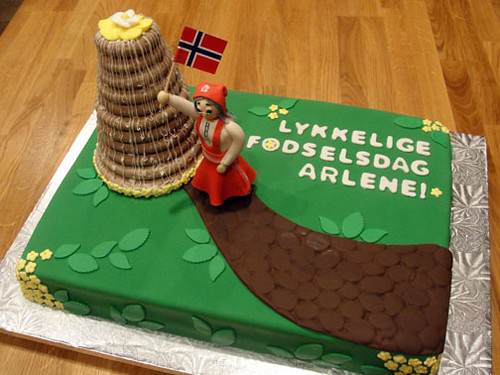
With the two major elements done, it was time for the cake. I baked a 11x15x3 sheet of french vanilla cake and filled it with bavarian cream after leveling and torting it. Once the cake settled, I crumb coated the sheet cake with vanilla buttercream. The cake then received a smooth blanket of green fondant. The trick to covering a square or rectangular cake is to work on the corners first, and then smoothing out the sides. A strip of chocolate fondant was then rolled and imprinted with a cobble stone pattern for the road. This is where the miniature Arlene would be standing on the cake. "Happy Birthday Arlene!" was cut out of white fondant and adhered to the cake with a dab of water. The Norwegian translation was provided by Penny, and I thank her for it. I wouldn't have known if what I found online would be correct or not. The Kransekake and Arlene were then attached to the cake with the help of some gum glue and wooden skewers to secure. I dreaded the idea that Penny would arrive at her destination only to find the tower of rings on its side. I made sure that wouldn't happen. For a finishing touch, royal icing flowers were placed in various areas of the cake, and accented with a bit of green leave cutouts. The result? A lovely Norwegian theme cake for the birthday girl!
P.S. The cake made it in one piece!
Sheila's Cherry Blossom Baby Shower Cake
August 10, 2011
When I last spoke to my sister's childhood friend, Sheila told me, "You are going to make a cake for me!". Sure enough. A few months later, I received a message from her explaining that she wanted a cake for her baby shower, and that her sisters would be contacting me shortly. I couldn't wait to see what they had in mind for her, especially after knowing her for so long. The theme was based around cherry blossoms, and the colors are pink, white, silver, and accents of brown. With so many samples of cherry blossom cakes, it is a challenge to design one that looked like a baby shower and not a wedding cake.
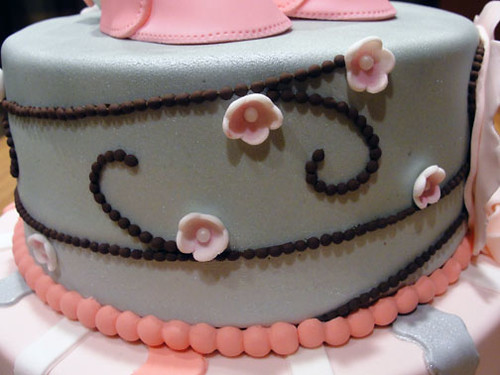
I began with one sketch and sent it over, but the design didn't really scream to them, I told you this was going to be hard. The final design was pretty much a 360 from the original idea, but still keeping the cherry blossoms. Two cake flavors made up the cake: red velvet with cream cheese on the bottom, and classic vanilla and vanilla on the top. The 10" bottom received a blanket of pale pink, and was accented with wavy fondant ribbons of a brighter pink and shimmery silver. Straight strips of white fondant broke up the spaces in between. The 8" top layer ( where most of work happened ) was first covered in a light gray fondant, and then was airbrushed with a silver sheen. The two layers were then stacked before I continued. Small beads of chocolate fondant were attached to the top layer in flowing swirls around the cake, creating these delicate and whimsical branches. Small cherry blossoms were cut out of white fondant, and cupped on a thick foam for shape. I brushed the center of each one with some pink petal dust for a natural and subtle color, and accented with an edible candy pearl. For the message plate, I created a soft, hand-stitched ribbon out of layers of pink and white fondant. The message is written in a edible color marker!
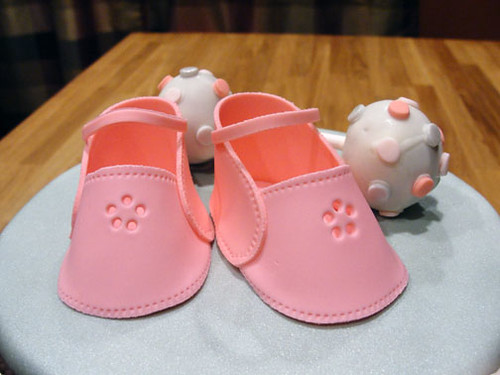
My favorite part of creating this cake was definitely the toppers. I created some paper templates for the three parts of the booties, and cut out the sole, toe, and heel. These were attached to each other with a bit of gum glue, then gently filled with tissue to hold its shape until dried. Do you see the eyelets? I punched those out using a #2 icing tip. They added so much character to the cute booties. The rattle, which I designated to be eaten by the mommy-to-be, was actually two cake balls on a lollipop stick. I crumbled up some cake with a bit of frosting, and rolled the mixture into two perfect balls. I allowed these to set in the fridge for a bit before attaching them to the stick. I gave each end a good dip in one smooth motion, and tapped off the excess candy coating. Using a #5 tip, I cut out little dots of different color fondant and attached them to the rattle. I couldn't be any happier with the results. Congrats again to Sheila!
Subscribe to:
Posts (Atom)




Social Icons