Riley's Pink Minnie Mouse Cake
June 23, 2014
Recently, I received an email from Jessica! Okay, so I received an email from her.... big deal, right? Yes, it is! Let me run a little back story here. About 2 years ago, I made a cake for a friend of a friend. That was the first time I was going outside of my normal circle, and I was super nervous. It was a cake for her niece's first birthday, and I really wanted to impress them. I designed a wonderful Strawberry Shortcake themed cake, and a smash cake to match. When I emailed to follow up, I didn't get a response. That left me a little worried, and I ran through a billion scenarios in my head. The thought of them not liking the cake lingered in my mind for almost 2 years! Now, you see why this email was such a big deal? Well, it turns out that they loved it and were hoping I would help with her other niece's first birthday cake... My first Minnie Mouse Cake!
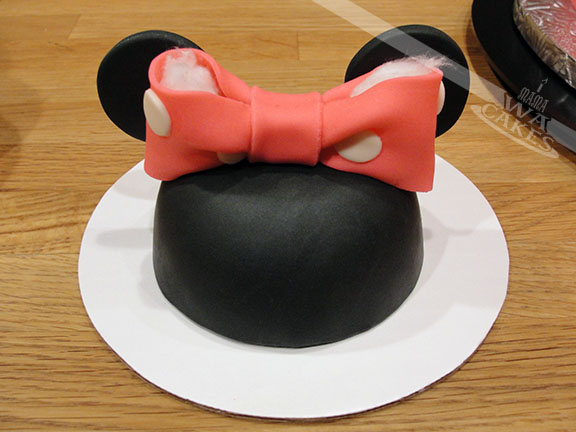
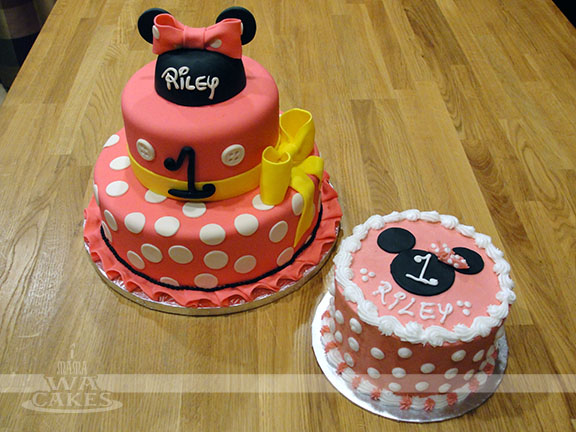
To start, I created the signature mouse hat by covering a small spice bowl with black fondant that I had added tylose to. A pinch of this powder will allow the fondant to dry like gumpaste. This is a great tool to have when working with dark colors... no need for mixing the color when there is ready made fondant! I allowed that to dry completely before carefully removing the hat part from the bowl. A great is to cover the outside of the bowl with cornstarch or powder sugar so the fondant won't stick. I then added the ears and a pretty pink bow. To give the bow a nice full shape, I stuffed a bit of tissue inside the loops and left them until they dried completely. The same method was also used to create the yellow accent bow on the cake. I rolled out a long wide strip of fondant and pinch the center, folded in the loops and pinched again to meet at the center. A narrow strip then was wrapped around the center to finish the bow. Once again, I left the tissue in the loops until it dried to give it fullness.
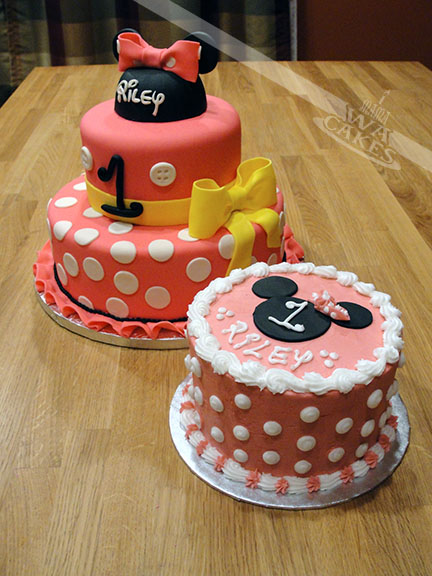
And on to the main cake! I started with a 10 inch cake that had a layer of yellow, and a layer of rich chocolate cake. The layers were torted and filled with a sweet and tangy strawberry cream cheese filling. The top 6 inch cake were two layers of chocolate nestled around a cloud of decadent coconut flakes and cream. The two cakes were crumb coated before they received a blanket of smooth pink fondant. To stack the the two cakes, I figured out the center of my cakes and measured the height of my base cake. I cut bubble straws to the proper height, and carefully inserted them half way into the cake. This is a trick I used to keep my cakes clean, and gives me time to adjust my placement if need be. I pipe a dollop of buttercream at the top of the straws, and align my top cake. I carefully release the cake, and allow it's weight to lower itself on to the base cake. This works great with buttercream cakes too! No buttercream covered fingers or gouged tops.
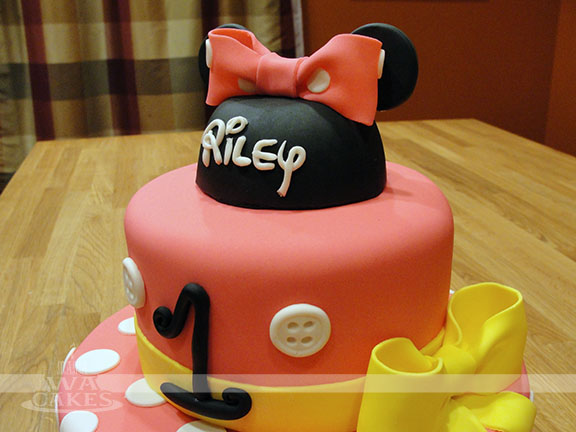 Once the cakes were stacked, I added a ribbon of yellow around the bottom of the 6 inch, and a random pattern of white polka dots were attached with a little water. The yellow bow was then attached off center, with a flow of ribbon sitting below it. The Minnie Mouse hat was then attached to the top with a bit of clear piping gel. Be careful when doing this because piping gel will dry shiny. For the finishing touches, I hand shaped Riley's name in the signature Walt Disney font and added it to the hat. I was extremely happy with how the font turned out, being a type freak and all :) I then molded two white buttons to resemble those Minnie's dress, and a whimsical number 1 for the birthday girl.
To start, I created the signature mouse hat by covering a small spice bowl with black fondant that I had added tylose to. A pinch of this powder will allow the fondant to dry like gumpaste. This is a great tool to have when working with dark colors... no need for mixing the color when there is ready made fondant! I allowed that to dry completely before carefully removing the hat part from the bowl. A great is to cover the outside of the bowl with cornstarch or powder sugar so the fondant won't stick. I then added the ears and a pretty pink bow. To give the bow a nice full shape, I stuffed a bit of tissue inside the loops and left them until they dried completely. The same method was also used to create the yellow accent bow on the cake. I rolled out a long wide strip of fondant and pinch the center, folded in the loops and pinched again to meet at the center. A narrow strip then was wrapped around the center to finish the bow. Once again, I left the tissue in the loops until it dried to give it fullness.
And on to the main cake! I started with a 10 inch cake that had a layer of yellow, and a layer of rich chocolate cake. The layers were torted and filled with a sweet and tangy strawberry cream cheese filling. The top 6 inch cake were two layers of chocolate nestled around a cloud of decadent coconut flakes and cream. The two cakes were crumb coated before they received a blanket of smooth pink fondant. To stack the the two cakes, I figured out the center of my cakes and measured the height of my base cake. I cut bubble straws to the proper height, and carefully inserted them half way into the cake. This is a trick I used to keep my cakes clean, and gives me time to adjust my placement if need be. I pipe a dollop of buttercream at the top of the straws, and align my top cake. I carefully release the cake, and allow it's weight to lower itself on to the base cake. This works great with buttercream cakes too! No buttercream covered fingers or gouged tops.
 Once the cakes were stacked, I added a ribbon of yellow around the bottom of the 6 inch, and a random pattern of white polka dots were attached with a little water. The yellow bow was then attached off center, with a flow of ribbon sitting below it. The Minnie Mouse hat was then attached to the top with a bit of clear piping gel. Be careful when doing this because piping gel will dry shiny. For the finishing touches, I hand shaped Riley's name in the signature Walt Disney font and added it to the hat. I was extremely happy with how the font turned out, being a type freak and all :) I then molded two white buttons to resemble those Minnie's dress, and a whimsical number 1 for the birthday girl.
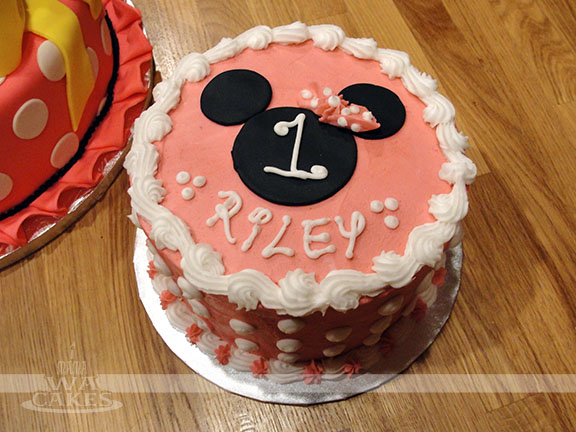
The smash cake designed with the same visual elements in mind to tie it all together. I started with a 6 inch vanilla cake filled with vanilla buttercream. The small stack of goodness was then covered in pink buttercream, and decorated with white polk dots and shell borders. I then cut out the mouse silhouette out of black fondant, and piped a pink and white polka dot bow to match the topper of the main cake. To make it complete, I piped the same whimsical number 1, and her name in white buttercream. Happy Birthday Riley!!!!
Subscribe to:
Posts (Atom)







Social Icons